A realistic 2 week Patagonia itinerary: Day 1-14 across El Calafate, El Chalten and Torres del Paine, with transport, the W Trek and weather buffers.
By Patagonia Tourism Guide · First published 8 Jul 2026 · Updated 1 Aug 2026
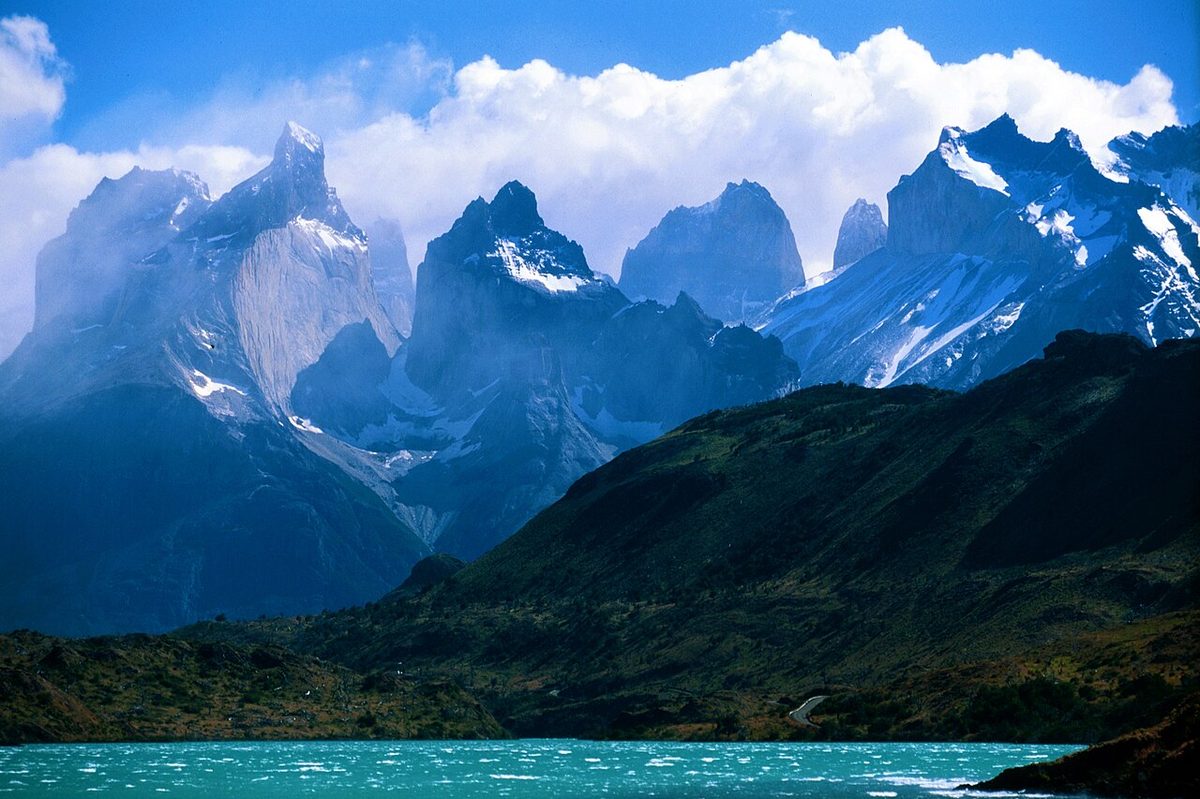
0 — 2 km Fig. 1 · The Cuernos del Paine rising over a turquoise lake on a 2 week Patagonia itinerary · Photo: Winky from Oxford, UK / CC BY 2.0 via Wikimedia Commons
If you have two weeks for Patagonia, you have just won the most useful argument in trip planning. Not because 14 days lets you “see it all” — nothing does — but because it gives you a week on each side of the border without turning every morning into a transfer. You can stand at Perito Moreno, hike under Fitz Roy, and walk into Torres del Paine, and still have a day or two in hand for when a cloud refuses to lift.
The best 2 week Patagonia itinerary, for most first-time travelers, is the classic southern route done slowly: El Calafate for Perito Moreno Glacier, El Chalten for Fitz Roy day hikes, then across to Puerto Natales and Torres del Paine for either day hikes or the W Trek. Fly into one country, out of the other, and protect two weather buffer days. That is the whole plan.
This guide is for the independent traveler with roughly 14 days who wants a real day-by-day plan, not a brochure. It assumes you are reasonably fit, willing to take a bus or two, and comfortable rearranging a day around the forecast. If you want the wider menu of trip lengths first, start with the Patagonia itinerary planner and come back. If your travel month is not locked yet, read when to visit Patagonia before you book anything.
I have written this the way I would actually brief a friend: here is the route, here is what each day costs you in travel time, here is where two weeks goes wrong, and here are two alternative routings if you are a hardcore hiker or if you simply must add Ushuaia.
The Best 2 Week Patagonia Itinerary at a Glance
Two weeks works because the southern Patagonia icons sit on one sensible line. You are not zig-zagging the continent. You are moving south-to-north or north-to-south along a corridor that buses, shared transfers and a couple of short flights already serve.
Here is the canonical 14-day route in one table. Read it first; the day-by-day below just fills in the detail.
Day
Base
Main activity
Transport that day
1
El Calafate
Arrive, settle, sort cash and transport
Fly in (via Buenos Aires)
2
El Calafate
Perito Moreno Glacier
Bus/tour ~1h30 each way
3
El Chalten
Transfer, short arrival hike if clear
Bus ~3h (215 km)
4
El Chalten
Laguna de los Tres (Fitz Roy)
On foot from town
5
El Chalten
Laguna Torre or Loma del Pliegue Tumbado
On foot from town
6
El Chalten
Weather buffer / second-chance hike
On foot from town
7
Puerto Natales
Cross-border transfer day
Bus ~6-7h incl. border
8
Puerto Natales
Prep: food, gear, park tickets, rest
Town day
9
Torres del Paine
Base Torres viewpoint or park entry
Bus ~2h to park
10
Torres del Paine
French Valley / Cuernos area
In-park / day-hike transport
11
Torres del Paine
Grey Glacier area
In-park / day-hike transport
12
Torres del Paine
Spare park day or scenic drive
In-park transport
13
Puerto Natales
Buffer / return positioning
Bus from park ~2h
14
Depart
Fly out (Puerto Natales or Punta Arenas)
Transfer + flight
Swipe to see all columns
Table 1
A few honest notes before you fall in love with the grid. The single most important decision is whether your Torres del Paine block (Days 9 to 12) is a multi-day W Trek with fixed hut bookings, or a flexible run of day hikes from Puerto Natales or an in-park lodge. The W Trek is glorious and the W Trek is a logistics commitment. I will give you both versions.
The second decision is direction. I have written this El Calafate first, Torres del Paine last, because warming up on El Chalten’s day hikes before a big trek is kinder on the legs. But if you want the W Trek, you may have to flip the whole trip and build it around your trek dates, because Chile Travel notes that refugio and campsite reservations are mandatory before you even reach the park gate, and those slots sell out months ahead. Availability, not elegance, wins.
Day 1 — Arrive in El Calafate
You will almost certainly route through Buenos Aires and take a domestic flight south. Visit Argentina describes El Calafate as a practical gateway for southern Argentine Patagonia, with its own airport on the shore of Lago Argentino. The flight is the easy part; the connection is where two weeks quietly leaks a day.
Do not book a same-day arrival into El Calafate that depends on a tight Buenos Aires connection. Domestic flights in Argentina shift schedules more than you would like, and the bus from Buenos Aires is a two-day affair, not a backup. Give yourself a buffer night in Buenos Aires if your international flight lands the same morning.
Once you are down, keep today soft. The airport sits around 20 to 30 minutes outside town. Get to your accommodation, pull cash, confirm your glacier transport for tomorrow, and walk the lakefront. The Laguna Nimez reserve is a flat, easy loop with flamingos if you have energy; otherwise eat well and sleep. You flew a long way to be tired tomorrow, not today.
Where to base: in El Calafate town, near the main street, for two nights. For how to choose between towns and in-park lodges across the whole trip, see how accommodation works down south.
Day 2 — Perito Moreno Glacier
This is the easiest big win in Patagonia, and that is exactly why it belongs on Day 2: it asks almost nothing of your legs while your body is still adjusting. Visit Argentina says Perito Moreno Glacier sits around 80 kilometres from El Calafate by Ruta Provincial 11, roughly 1 hour 30 minutes by car. Most people take a tour or shuttle bus; the ride each way is around 90 minutes.
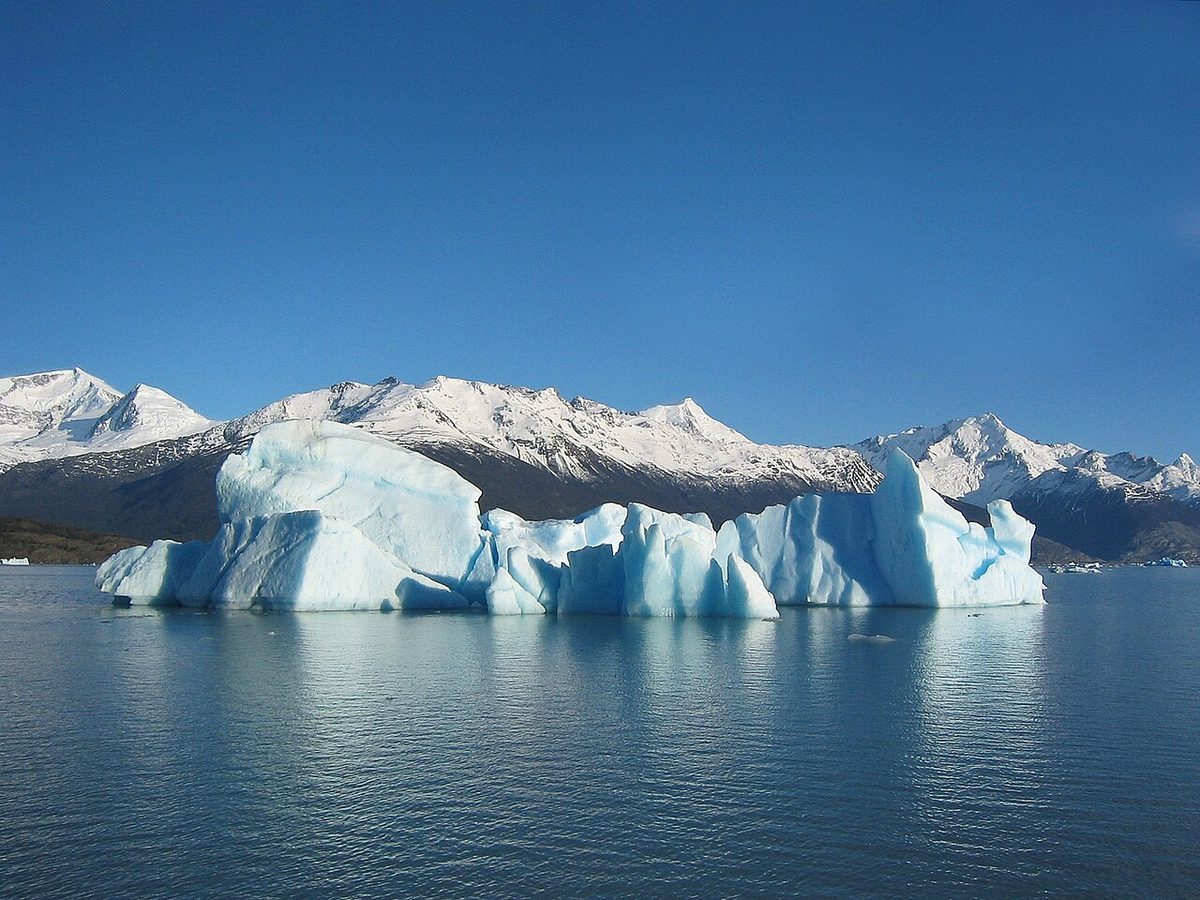
Spend the day on the walkways. The network of steel boardwalks lets you watch the glacier face from a dozen angles, and if you are lucky a slab the size of a building calves off and detonates into the lake while you are looking at it. You can easily lose three hours here just letting your brain catch up with the scale.
If your budget and season allow, add a boat tour for a closer angle, or ice trekking (the “Minitrekking” and “Big Ice” options) to actually walk on the surface. None of it is cheap, and prices move, so check current rates before you commit. The walkways alone are not a consolation prize — I would do this day even if every add-on were sold out.
Back in town tonight you have a choice that genuinely matters: stay one more night in El Calafate, or transfer straight to El Chalten this evening. If the El Chalten forecast looks good and worsening, go tonight and bank the morning. If the forecast is stable, sleep here and travel rested tomorrow. For everything glacier-related, the El Calafate and Perito Moreno Glacier guide goes deeper than I can here.
Day 3 — Transfer to El Chalten
El Chalten is the hiking heart of this itinerary, and the good news is that getting there is simple. Visit Argentina notes that El Chalten is mainly reached from El Calafate, about 215 kilometres away, by car or regular bus. Plan on around three hours. There are also direct buses from El Calafate airport to El Chalten if you would rather skip town entirely and swap the order of your first stops.
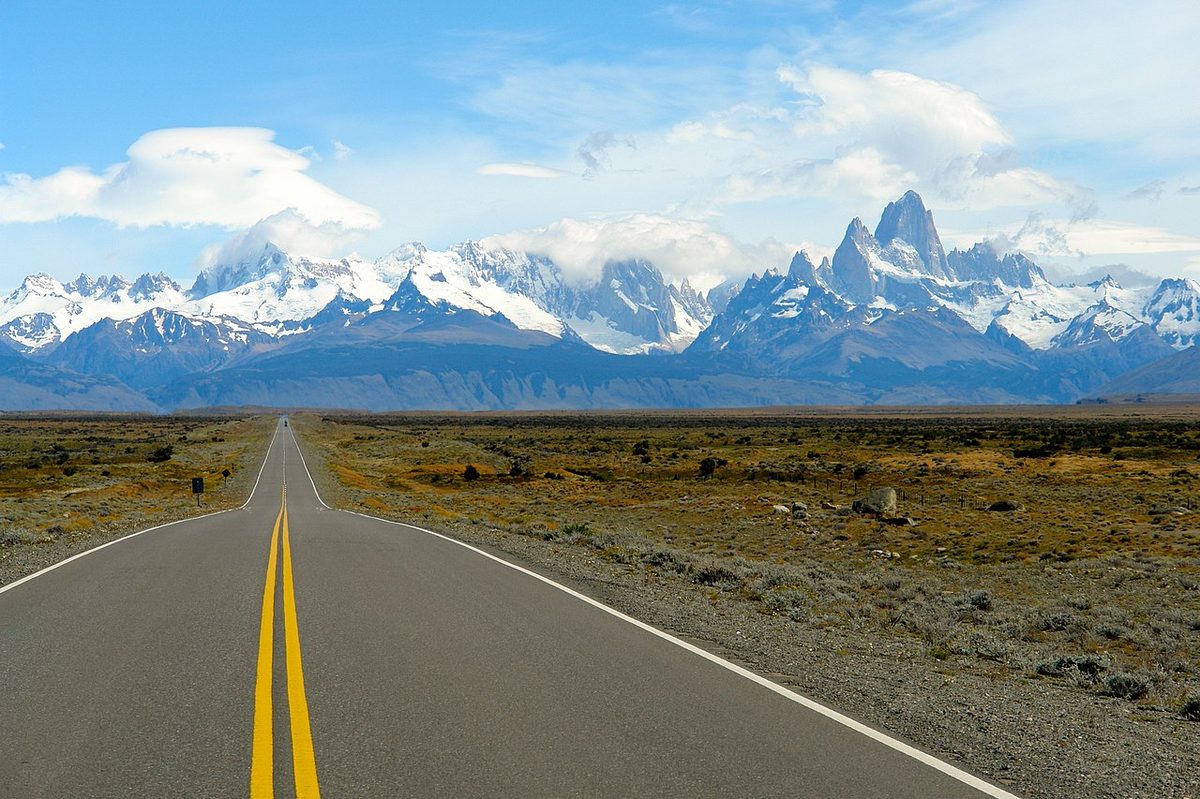
The road delivers you, on a clear day, to a small grid of streets sitting directly beneath Cerro Torre and Fitz Roy. That is the whole appeal of El Chalten: the trailheads start at the edge of town. You do not drive to the hikes. You walk out your door.
If you arrive with clear skies and a good forecast holding, do not hoard the views. Take a short afternoon walk — Chorrillo del Salto (a flat stroll to a waterfall) or the Mirador de los Condores loop — to stretch out the bus legs. If the afternoon is bright but the coming days look ugly, consider walking ninety minutes up the Laguna de los Tres trail to Mirador Fitz Roy and back, just to be sure you saw the mountain at all.
Where to base: in El Chalten town for four nights. Yes, four. This is the number that protects the whole trip.
Here is where I get bossy. The most common way a 2 week Patagonia itinerary disappoints people is by giving El Chalten one hiking day and betting the Fitz Roy view on a single forecast. Patagonia does not read your itinerary. Give it three days here and you turn one anxious gamble into a relaxed game of patience.
There are three hikes I would prioritise, and you do not need to do all of them.
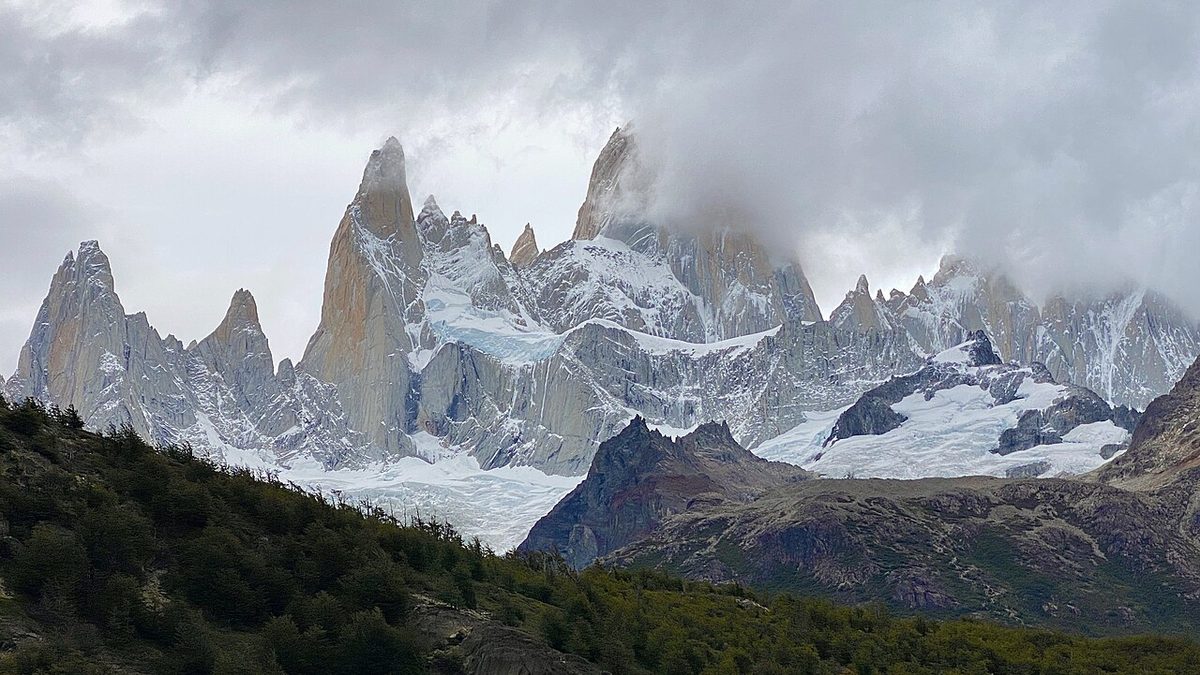
Day 4 — Laguna de los Tres. This is the iconic one: the long day hike that ends with Fitz Roy looming over a turquoise lake. It is the toughest and most rewarding, with a steep final climb. Use your single best weather day for it and do not be stubborn about the order. The detailed hiking to Fitz Roy breaks down distances, the final push and where people run out of legs.
Day 5 — Laguna Torre or Loma del Pliegue Tumbado. Laguna Torre is shorter and gentler, ending at a glacial lake beneath Cerro Torre — the one to choose if the weather looks like it might turn partway through. Loma del Pliegue Tumbado is a bigger effort that earns a panoramic view of the whole massif, but it is only worth it on a clear day.
Day 6 — Buffer. This is the day that makes the itinerary honest. If you have already had two clear days, use it for a third hike, a rest, or that brownie everyone in town keeps mentioning. If the weather robbed you earlier, this is your second chance at Fitz Roy. Either way, you are not leaving El Chalten wishing you had given it one more day.
A practical note on comfort: you can camp here, but you do not have to. El Chalten lets you hike all day and still sleep in a warm bed with a hot shower and a proper dinner. For most travelers on a two-week trip, that is the right call. Save the camping commitment for the W Trek, if you do it at all.
Day 7 — Cross the Border to Puerto Natales
Today is a logistics day. Treat it like one — it is the structural spine of the trip, not scenic filler. You are leaving Argentina for Chile, and Puerto Natales is the gateway town for Torres del Paine.
The usual move is a direct bus from El Calafate to Puerto Natales. Without delays at the border, that run takes around six to seven hours, including the time everyone spends queuing at Argentine exit and Chilean entry control. There are usually a few departures a day. If you are coming from El Chalten, you take a morning bus to El Calafate first, then connect — which is a very long travel day. The gentler alternative is to bus back to El Calafate on the evening of Day 6, sleep there, and take a morning bus to Puerto Natales today. Either works; pick based on how much you hate long transit days.
Two border realities worth internalising. First, do not bring fresh fruit, meat or other restricted food across — Chile is strict, and it will be confiscated. Second, if you are driving a rental car instead of taking the bus, you need a cross-border permit arranged with the rental company in advance (often around US$100 plus paperwork), and you must get the permit stamped at the border. For the full logistics of getting between regions, see How to Get to and Around Patagonia.
You will roll into Puerto Natales in the late afternoon or evening, tired. That is fine. Tomorrow is built for recovery.
Day 8 — Puerto Natales Prep Day
The distances in Patagonia hand you a forced rest day here, and you will be grateful for it. Puerto Natales is a pretty, low-key town on the water with snow-capped peaks in the distance, good coffee, and a surprising number of outdoor shops.
Use today to get ready for Torres del Paine. If you are doing the W Trek, this is when you buy your trail food at the supermarkets (not cheap; do not overthink it, just fuel your body), confirm or collect any rented gear, and triple-check your refugio and campsite reservations and bus tickets. If you are doing day hikes, today is lighter: confirm your park transport or rental car, sort park tickets, do laundry, and eat a real meal, because the next few days are about trails.
Either way, have a proper dinner tonight. King crab and a glass of something is a fair reward for a border day. The full park briefing — entrances, transport inside the park, when to go where — lives in the Torres del Paine planning guide.
Where to base: Puerto Natales for tonight, and as your hub if you are doing day hikes. If you are doing the W Trek or staying in-park, this is your launch pad.
This is the climax of the trip, and how you spend these four days depends on the one decision I keep flagging: W Trek, or day hikes. I will give you both, because the right answer is genuinely personal.
Option A — Torres del Paine as day hikes
Best for travelers who want the park’s greatest hits without the fixed-booking, carry-your-bed-on-your-back commitment of a multi-day trek. You base in Puerto Natales (cheaper, more flexible) or at an in-park lodge (pricier, less daily travel), and pick off the big viewpoints one at a time.
Day 9 — Base Torres. The signature hike to the granite towers above their glacial lagoon. It is a long, demanding day with a steep, rocky final climb and often serious wind, but it is the view the park is named for.
Day 10 — French Valley / Cuernos area. Walk into the amphitheatre of granite peaks and hanging glaciers, or do the shorter Mirador Cuernos and Condor lookouts if you want a lighter day with huge payoff.
Day 11 — Grey Glacier. Hike to the viewpoints over Lago Grey and its floating icebergs, or take a boat onto the lake toward the ice wall.
Day 12 — Spare park day. Repeat a favourite, add a scenic drive, look for guanaco and condor, or rest. Having this day means a single bad-weather morning does not wreck the whole block.
A from-Puerto-Natales day-hike rhythm means a bus of around two hours into the park each way — real time you spend sitting. An in-park base cuts that down. There is no park shuttle linking everything, so a rental car helps if you want to roam, though it is not essential.
Option B — Torres del Paine as the W Trek
Best for hikers who came to Patagonia to walk. The W Trek is the famous one, and it is worth the hype. Chile Travel’s W Trek guide describes it as a roughly 70-kilometre route drawn as a “W” across the park over about five days, linking three headline sights: the Base of the Towers viewpoint, the French Valley, and Grey Glacier.
The official day-by-day runs like this. Day one: from Puerto Natales, take a bus of around two hours to the Laguna Amarga entrance, register at the CONAF gate, then a connecting bus to the Las Torres area to settle in. Day two: the big climb to the Base Torres viewpoint, an 8-to-10-hour round trip through the Ascencio Valley. Day three: a gentler hike bordering Lake Nordenskjold under the Cuernos del Paine. Day four: up into the French Valley, surrounded by hanging glaciers, then on to Refugio Paine Grande. Day five: the final arm to Grey Glacier and back, around eight hours, finishing with a catamaran across Lake Pehoe to Pudeto, where buses return you to Puerto Natales.
Two non-negotiables. First, Chile Travel stresses that you must have reservations for every refugio and campsite before you arrive at the gate — there is no winging it — and recommends booking six months or more ahead because capacity is very limited. Second, the W is linear, not a loop, so you finish far from where you started; the buses and the catamaran are part of the route, not extras. Verify current park rules with CONAF close to your travel date, especially outside peak summer. For trek-specific planning, the Torres del Paine W Trek and O Circuit guide is the one to read before you book a single hut night.
If you run the five-day W across Days 8 to 12, your Puerto Natales prep happens on the morning you set out, so arrive in town a day earlier or keep the El Chalten block to three nights. This is the trade-off the W demands: more trail, less slack.
Day 13 — Buffer or Return Positioning
Whatever you did in the park, today is your insurance. If a storm stole a Torres del Paine day, you take it back now. If everything went to plan, use today for a calm morning in Puerto Natales, a final wander, or positioning toward your departure airport.
This is also the day to confirm tomorrow’s transport with zero wishful thinking. If you are flying out of Punta Arenas rather than Puerto Natales, remember it is around three hours by bus between the two, so you may need to travel this afternoon and sleep near the airport.
Day 14 — Depart
Fly home, or onward. Chile Travel notes you can fly out of Puerto Natales (PNT) directly, though Punta Arenas (PUQ) has more frequent flights and is the safer bet if your connections are tight. Build in margin: a missed regional flight at the end of a two-week trip is a brutal way to finish.
If you have a few spare hours and went via Punta Arenas, a day trip to the penguins on Isla Magdalena is a lovely full stop. Otherwise, this is goodbye to Patagonia — for now.
The route above is the best fit for most people. But “most people” is not everyone. Here are two alternative 14-day routings, plus an Argentina-only fallback, depending on what you actually want.
The W-Trek-Focused Version
Best for hikers for whom the W Trek is the entire point and everything else is a bonus.
Days 1-2: Arrive El Calafate, Perito Moreno Glacier.
Day 3: Transfer to El Chalten.
Days 4-6: El Chalten day hikes plus a weather buffer.
Day 7: Transfer to Puerto Natales.
Day 8: Prep day in Puerto Natales.
Days 9-13: Five-day W Trek.
Day 14: Return to Puerto Natales and depart, or add a night if flights require.
This keeps the Argentine highlights but commits the back half to the trek. It depends entirely on your refugio bookings, and it leaves little recovery time, so it suits experienced hikers more than first-timers. If you are not sure your legs are ready, switch the park block to day hikes and you lose nothing but bragging rights. The Patagonia hiking itinerary lays out trail-first pacing for the whole region.
The Both-Countries-Highlights Version (with Ushuaia)
Best for travelers drawn to the far south — the Beagle Channel, Tierra del Fuego, the “end of the world” — who are willing to trade some depth elsewhere for it.
Days 1-3: Arrive Ushuaia, Beagle Channel boat trip, Tierra del Fuego National Park.
Day 4: Fly Ushuaia to El Calafate.
Day 5: Perito Moreno Glacier.
Days 6-8: El Chalten hikes and buffer.
Day 9: Transfer to Puerto Natales.
Days 10-13: Torres del Paine day hikes.
Day 14: Depart from Punta Arenas.
Visit Argentina’s Ushuaia page recommends two to four days and highlights the Beagle Channel, Tierra del Fuego National Park, the Martial Glacier and Cerro Castor, plus its role as the Antarctica gateway. Be honest with yourself, though: adding Ushuaia means everything else gets a little less time. I would only do this if the far south is a genuine dream, not a checkbox. The Ushuaia and Tierra del Fuego guide helps you decide if it earns its days. If you would rather not skip the W Trek for it, you cannot have both in two weeks — pick one and save the other for a 3 week Patagonia itinerary.
The Argentina-Only Version (no border crossing)
Best for travelers who want the simplest logistics and strong hiking without crossing into Chile at all.
Route: Buenos Aires to El Calafate to El Chalten, then a flight to Bariloche or Ushuaia, and back via Buenos Aires. You get Perito Moreno, Fitz Roy and either northern lake country or the far south, with no border-permit faff and no cross-country bus marathon.
The Argentina-only route is underrated. Some travelers feel they have failed if they do not set foot in Chile. You have not failed. You have chosen a route that fits your time and skips a border day. If you want to weigh the two countries properly, Argentina vs Chile Patagonia does exactly that.
Transport and Border Logistics
The classic 14-day route runs almost entirely on buses and a couple of short flights, which is why it works for independent travelers.
Flights. Look at an open-jaw ticket: in to El Calafate, out of Punta Arenas (or Puerto Natales). Flying into one country and out of the other saves you backtracking and a wasted day. Sometimes it costs more than a round trip; sometimes it saves a full day of travel. Compare both, not just the headline fare. International flights via Santiago are often cheaper than via Buenos Aires, so do the math on an extra cross-Andes hop.
Buses. Buses are the backbone here: El Calafate to El Chalten (around three hours), El Calafate to Puerto Natales (around six to seven with the border), and Puerto Natales to Torres del Paine (around two hours). They are comfortable and reasonably priced, but they are not a metro. Schedules vary by season, and a missed connection reshapes the next day. Book popular cross-border buses a day or two ahead in peak season.
Rental cars. A car helps for Torres del Paine scenic flexibility and roaming, since the park has no shuttle linking everything. It also adds cross-border permits, one-way fees, gravel roads, fierce wind and fuel planning — there are no petrol stations near the park, so fill up in the last town and keep enough to get back. Rent a car when it solves a route problem, not because it feels adventurous.
Direction. Both directions work. North-to-south (El Calafate first) warms up your legs before the big trek and is how I have written this. South-to-north (Torres del Paine first) is often forced on you by W Trek availability — book the trek, then build the rest around it.
What to Book, and in What Order
Patagonia rewards booking the scarce, fixed things first and leaving the flexible things for later. In order:
International flights, if your dates are fixed.
Domestic gateway flights (into El Calafate, out of Punta Arenas or Puerto Natales).
The W Trek refugios and campsites, or in-park Torres del Paine lodging — these are the hardest to get and gate everything else.
High-demand small-town hotels in El Chalten, El Calafate and Puerto Natales (peak season fills fast).
Rental cars with cross-border paperwork, if you are driving.
Cross-border buses, a day or two ahead in peak season.
Park tickets and official passes close to travel, following current rules.
If your trip touches the shoulder season or winter, check CONAF before you assume any Torres del Paine route is open — guided requirements and seasonal closures change, which is precisely why you verify rather than trust a blog’s old screenshot.
Weather Buffers (Read This Twice)
This is the part most 14-day itineraries skip, and it is the part that separates a great trip from a frustrated one. Patagonia weather is genuinely fickle — wind, sudden cloud, a clear morning that closes in by lunch. The whole design of this itinerary is built to absorb that.
You have two structural buffers: Day 6 in El Chalten and Day 12 (or Day 13) around Torres del Paine. Do not spend them in advance. Their entire job is to exist unused until the day Fitz Roy hides behind cloud or a storm closes the towers, and then to quietly save the view you came for.
The single best weather habit is flexibility about order. In both El Chalten and Torres del Paine, do the most weather-dependent, most iconic hike on your best forecast day, even if that means reshuffling. Every experienced Patagonia traveler does the same thing: they get up, read the forecast, and rearrange the next two days. Plan to be that person.
For this itinerary, the prime window is late November through March, when the trails, refugios and park transport are all fully running and daylight is long. December to February gives maximum access and the most reliable infrastructure, at the cost of crowds and higher prices. March is my quiet favourite: fewer people, autumn colour in the lenga forests, and a calmer feel, with slightly more weather risk.
The shoulder edges — late September to October in spring, and March into April in autumn — reward you with colour, thinner crowds and better value, but you accept more uncertainty around snow and opening schedules. A winter (June to August) version of this exact route is not advisable; a winter Patagonia trip should be reshaped around guided Torres del Paine access, Bariloche skiing or Ushuaia snow, not a summer hiking plan with a thicker coat. For a month-by-month breakdown, use Best Time to Visit Patagonia.
Frequently Asked Questions
Is two weeks enough time for Patagonia?
Yes — two weeks is the sweet spot for a first trip. It gives you roughly a week on each side of the Argentina-Chile border, enough to see Perito Moreno, El Chalten and Torres del Paine without rushing every morning, and to absorb the long travel days and fickle weather. You cannot see all of Patagonia in 14 days, but you can do the southern classics properly.
What is the best 2 week Patagonia itinerary?
For most first-time travelers it is the classic southern route: El Calafate for Perito Moreno Glacier, El Chalten for Fitz Roy day hikes, then Puerto Natales and Torres del Paine for day hikes or the W Trek. Fly into one country and out of the other, give El Chalten four nights, and keep two weather buffer days in reserve.
Should I visit Argentina or Chile Patagonia in two weeks?
For a first trip, do both — that is the whole advantage of 14 days. Argentine Patagonia gives you Perito Moreno Glacier and El Chalten’s Fitz Roy hikes; Chilean Patagonia gives you Torres del Paine. The classic route links them with one border crossing. Only choose a single country if you want to skip the border day entirely or simplify logistics.
Do I have to do the W Trek?
No. The W Trek is spectacular but it is a fixed-booking commitment, with mandatory refugio and campsite reservations made months ahead. You can experience the same headline sights — Base Torres, the French Valley, Grey Glacier — as separate day hikes from Puerto Natales or an in-park lodge, with full flexibility and no carrying your bed. Day hikes suit most two-week first-timers better than the W.
Should I fly into Argentina and out of Chile?
Usually, yes. An open-jaw ticket — in to El Calafate, out of Punta Arenas or Puerto Natales — avoids backtracking and can save a full travel day at the end. International flights via Santiago are often cheaper than via Buenos Aires, so price an extra cross-Andes hop. Compare the open-jaw and round-trip totals before booking; sometimes the saving in time is worth a slightly higher fare.
How far in advance should I book Torres del Paine?
If you want the W Trek, book your refugios and campsites about six months ahead, or more for peak summer — Chile Travel stresses that reservations are mandatory before you reach the park gate and that capacity is very limited. For day hikes with a Puerto Natales base, you have far more flexibility, but still lock in high-demand lodging and any boat or ice-trek tours well ahead in December to February.
Can I add Ushuaia to a 2 week Patagonia itinerary?
You can, but something has to give. Ushuaia deserves two to four days for the Beagle Channel and Tierra del Fuego, so adding it means trimming El Chalten or Torres del Paine, or dropping the W Trek. It is worth it if the far south is a real dream rather than a box to tick. Otherwise, save Ushuaia for a three-week trip and keep your two weeks focused.
Final Thoughts
If a friend handed me two weeks and a flight to Patagonia, I would not start by asking how many places they could cram in. I would tell them to protect the route above: El Calafate, El Chalten, Puerto Natales, Torres del Paine, with four nights under Fitz Roy and two buffer days they promise not to touch.
Then I would ask one question — are you here to walk, or here to see? If the answer is “walk,” book the W Trek first and let the trip assemble around it. If the answer is “see,” do the day hikes, keep the flexibility, and spend your saved energy on glaciers, boat days and a proper steak dinner. Both are wonderful. Neither requires you to win Patagonia.
The best two-week itinerary is not the one that proves you saw everything. It is the one that has you standing in the right valley on the morning the cloud finally lifts. Build in the buffers, follow the forecast, and let Patagonia be Patagonia.