Plan a realistic Patagonia itinerary with 7-day, 10-day, 2-week, 3-week, and 1-month routes across Argentina and Chile.
By Patagonia Tourism Guide · First published 4 Jun 2026 · Updated 27 Sep 2026
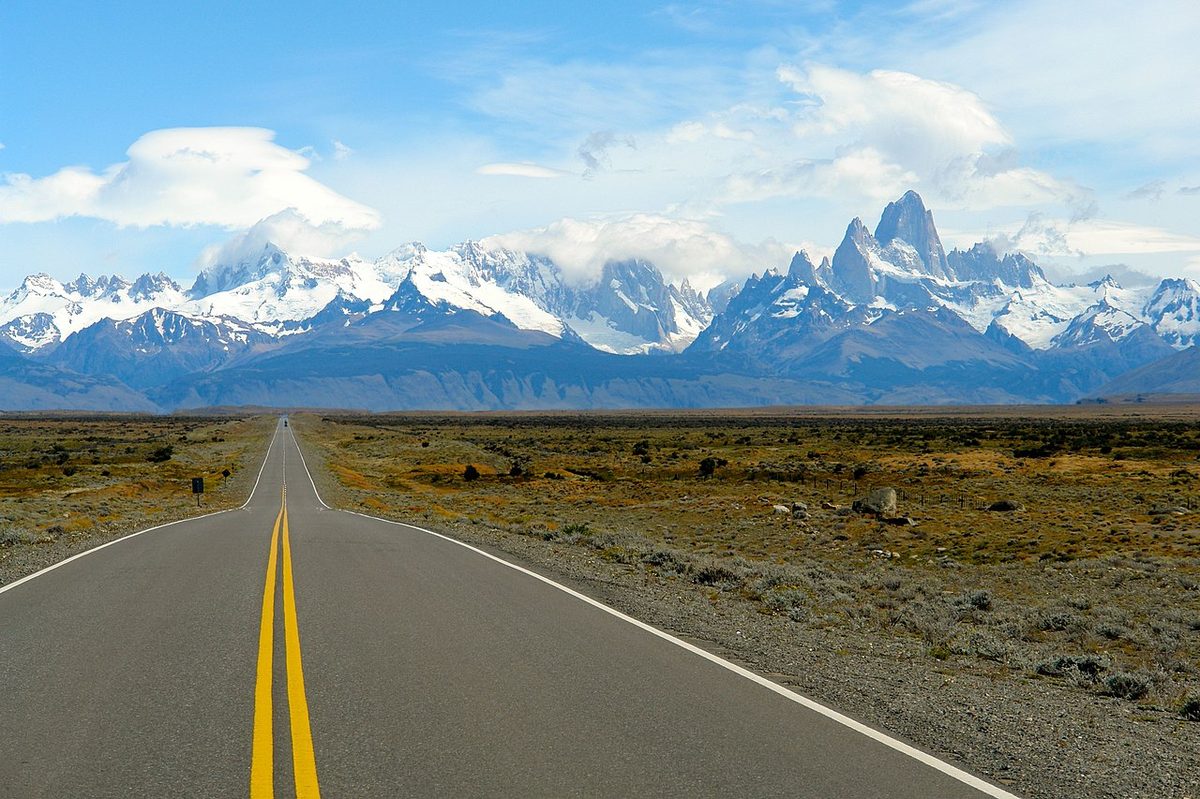
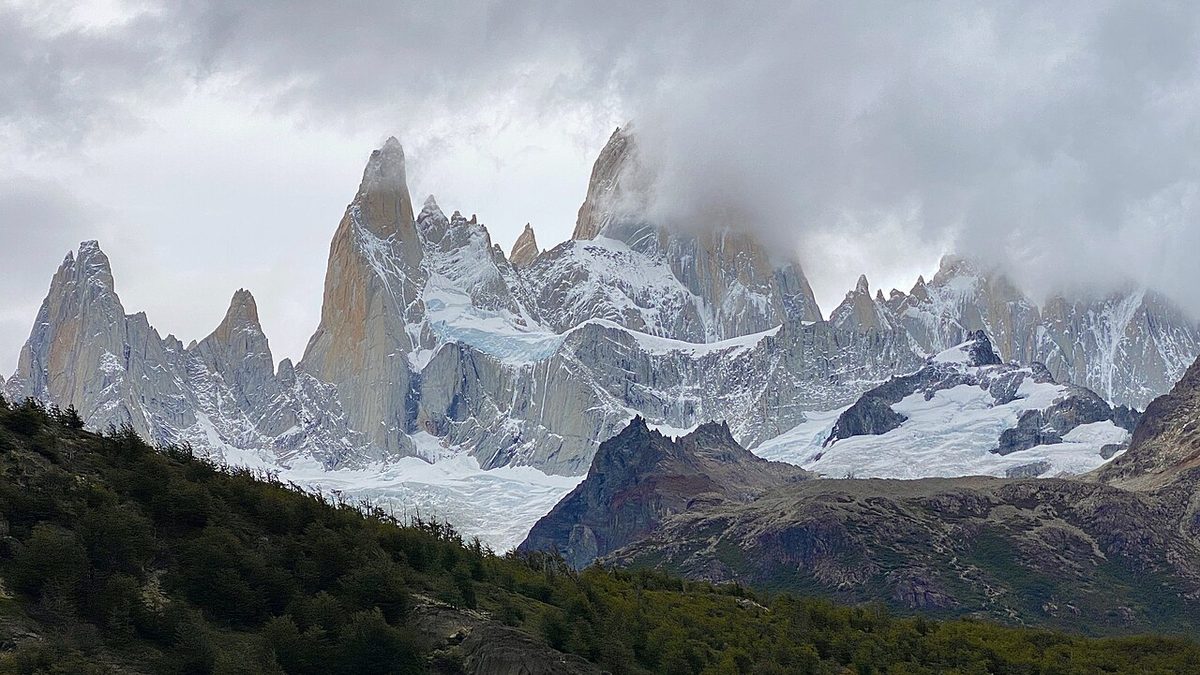
0 — 2 km Fig. 1 · A road leading toward Mount Fitz Roy in El Chalten, Argentina · Photo: https://www.flickr.com/people/43533334@N07/ / CC BY 2.0 via Wikimedia Commons
The best Patagonia itinerary is not the one with the most pins on the map. It is the one that still feels like a trip once Patagonia starts behaving like Patagonia.
That means wind. It means clouds hiding the mountain you flew 10 hours to see. It means a border crossing that takes longer than expected, a bus schedule that does not line up neatly with your flight, a W Trek campsite that sells out, a ferry that matters more than you realized, or a morning in El Chalten when every hiker in town is staring at the same forecast and quietly rearranging the next two days.
This Patagonia itinerary planner is built around that reality.
If you have 7 days in Patagonia, choose one region. Do not try to “do Patagonia.” Choose El Calafate and El Chalten, Torres del Paine, Bariloche, Ushuaia, or Peninsula Valdes if wildlife is the point.
If you have 10 days, you can build a strong southern Patagonia trip, but you need to be disciplined. The best 10-day Patagonia itinerary for most first-time travelers is El Calafate, El Chalten, Puerto Natales, and Torres del Paine, with either day hikes or a compressed version of the W Trek. It works, but it does not leave much room for mistakes.
If you have 2 weeks, you are in the sweet spot. A 2 week Patagonia itinerary can combine Perito Moreno Glacier, El Chalten, Puerto Natales, and Torres del Paine at a pace that feels like travel rather than endurance logistics. You can choose a W Trek version, a day-hiking version, or a more comfortable lodge-and-scenic-drive version.
If you have 3 weeks, you can add one major extension: Bariloche, Ushuaia, Peninsula Valdes, or a piece of the Carretera Austral. If you have a month, Patagonia finally opens up enough that you can stop treating every transfer day as a personal failure.
This guide gives you realistic routes for 7 days, 10 days, 2 weeks, 3 weeks, and 1 month, plus variants for hikers, road-trippers, backpackers, honeymooners, families, wildlife travelers, and people who want Patagonia without hard hiking.
If food, estancias, Welsh Chubut, king crab, Bariloche chocolate, local etiquette, or responsible travel are part of the reason you are going, keep the Patagonia Food, Culture and Responsible Travel Guide open while you choose extensions.
Torres del Paine for day hikes, viewpoints, or the W Trek.
This route works because the distances are manageable by Patagonia standards, the highlights are genuinely iconic, and you do not spend the whole trip trying to connect places that belong to a longer journey.
Patagonia itinerary planning gets easier when you stop starting with attractions and start with constraints.
The first constraint is scale. Visit Argentina describes Argentine Patagonia as an extensive region spanning six provinces and roughly 2,500 kilometers from north to south. That does not even include everything on the Chilean side. A traveler who says “I want to see Patagonia” is not making a plan yet. They are naming a region.
The second constraint is gateways. Patagonia routes usually depend on flights into or out of places like El Calafate, Bariloche, Ushuaia, Puerto Natales, Punta Arenas, Trelew, or Puerto Montt. The cheapest international flight to Buenos Aires or Santiago does not matter much if the domestic connection leaves you with a bad route.
The third constraint is weather. El Chalten is a good example. Visit Argentina notes that El Chalten is mainly accessed from El Calafate, about 215 kilometers away, by car or regular bus. That sounds simple. The route is simple. The mountain weather is not. If you only give El Chalten one hiking day, you are betting your Fitz Roy view on one forecast.
The fourth constraint is scarce bookings. The W Trek is not just “show up and walk.” Chile Travel’s W Trek guide says the journey begins in Puerto Natales, with about a 2-hour bus trip to Laguna Amarga, and that you must have reservations for refugios and campsites before arriving. That one fact can determine the whole shape of a 2 week Patagonia itinerary.
The fifth constraint is your actual travel style. A Patagonia backpacking itinerary, a honeymoon itinerary, a family itinerary, and a hiking itinerary should not be the same route with different hotels. They need different pacing.
Decide whether you are using buses, rental cars, flights, or guided transfers.
Book the route-defining pieces.
Add weather buffers.
Add one optional extension only if the trip length supports it.
If you do those steps in order, Patagonia becomes much less chaotic.
The Classic Patagonia Route
The classic first-time Patagonia route is:
El Calafate -> El Chalten -> Puerto Natales -> Torres del Paine
You can also run it in reverse:
Puerto Natales or Punta Arenas -> Torres del Paine -> El Calafate -> El Chalten
This is the strongest Patagonia route for most first-time travelers because it combines three huge payoffs:
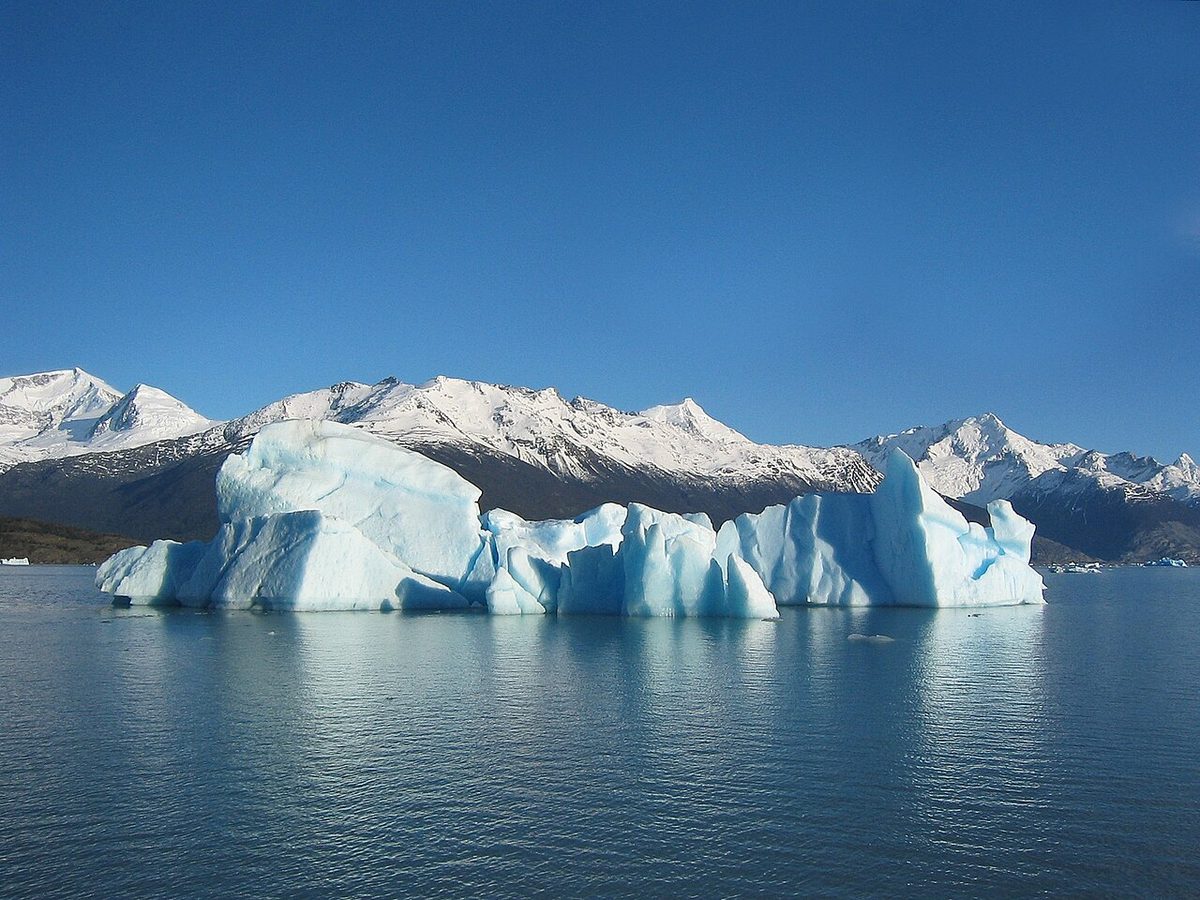
Perito Moreno Glacier from El Calafate.
Fitz Roy and Cerro Torre hikes from El Chalten.
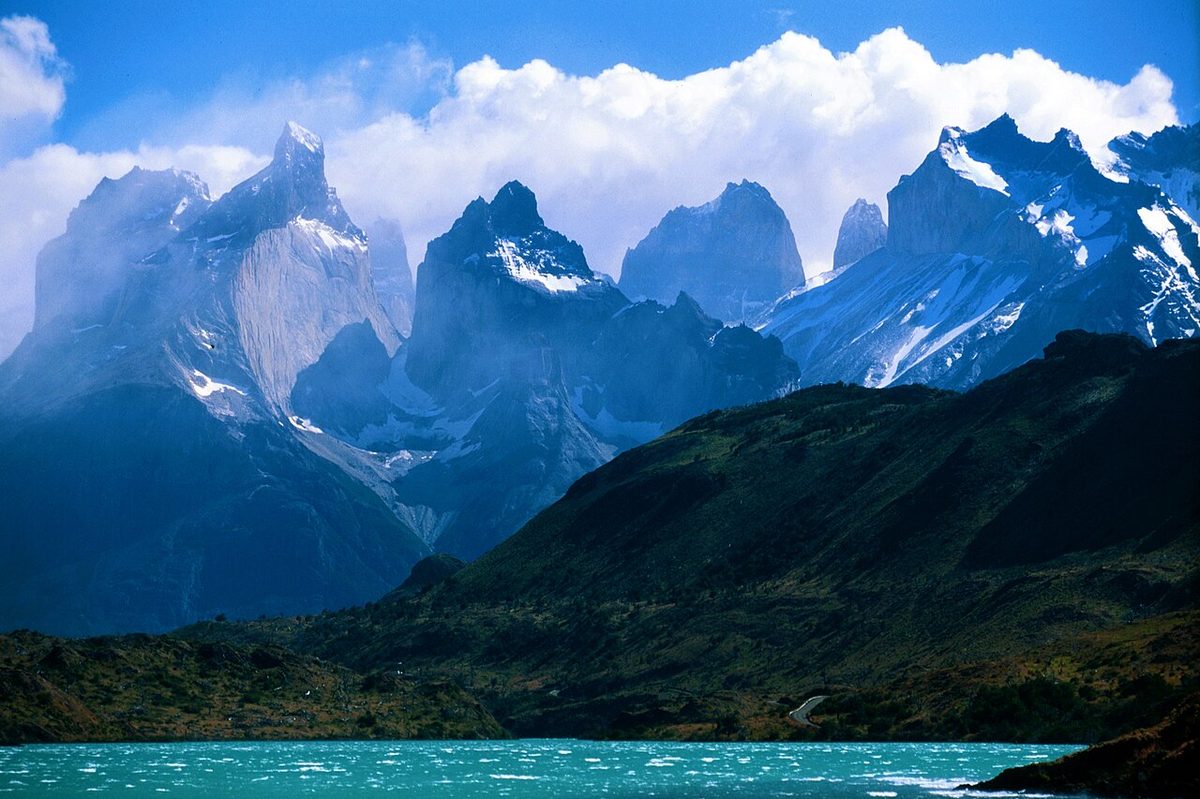
Torres del Paine from Puerto Natales or in-park lodging.
Visit Argentina says Perito Moreno Glacier is about 80 kilometers from El Calafate by Ruta Provincial 11, around 1 hour 30 minutes by car. El Calafate itself has its own airport and is a practical gateway for southern Argentine Patagonia. El Chalten is close enough to pair naturally with El Calafate, but it deserves its own nights.
On the Chilean side, Chile Travel describes Chilean Patagonia through Torres del Paine, fjords, forests, ice fields, the Carretera Austral, Punta Arenas, and Puerto Williams. For a first trip, Torres del Paine is usually the piece that fits most naturally with El Calafate and El Chalten.
The classic route works best in 10 to 14 days. Seven days can include some of it, but not all of it well. Three weeks lets you add Bariloche, Ushuaia, wildlife, or a road-trip section.
This is the summary version — for four full single-region routes mapped out day by day, see the complete 7 day Patagonia itinerary guide.
A 7 day Patagonia itinerary should focus on one region. That is not a timid recommendation. It is the difference between having a trip and having a logistics exercise.
With one week, choose one of these:
El Calafate and El Chalten.
Torres del Paine and Puerto Natales.
Bariloche and the Lake District.
Ushuaia and Tierra del Fuego.
Peninsula Valdes and Puerto Madryn for wildlife.
7 Days: El Calafate and El Chalten
Best for: first-time travelers who want glaciers and hiking without crossing into Chile.
This is the most efficient 7 day Patagonia itinerary for many independent travelers. You fly into El Calafate, visit Perito Moreno Glacier, transfer to El Chalten, spend several days hiking, then return to El Calafate for departure.
Day 1: Arrive in El Calafate.
Use this as a soft landing. Walk the town, sort cash, confirm transport, and sleep early if you came from a long international connection.
Day 2: Visit Perito Moreno Glacier.
Spend the day on the walkways. Add a boat trip or ice-trekking tour if it fits your budget and season. The glacier is one of Patagonia’s best short-trip wins because the access is straightforward and the payoff is huge.
Day 3: Transfer to El Chalten.
Travel north by bus or car. If weather is clear when you arrive, do a short viewpoint walk rather than saving every view for later.
Day 4: Laguna de los Tres or Fitz Roy viewpoint day.
Use your best weather day for the hike that matters most to you. Do not be stubborn about the order. Patagonia rewards people who follow the forecast.
Day 5: Laguna Torre, Loma del Pliegue Tumbado, or another El Chalten hike.
Choose based on weather, fitness, and how your legs feel.
Day 6: Buffer day in El Chalten.
This is the day that makes the itinerary work. If the weather was good earlier, use it for another hike. If not, this is your second chance.
Day 7: Return to El Calafate and depart.
Do not book a same-day international connection unless you have a very clear transfer plan and a high tolerance for risk.
Why this route works: It uses one airport, avoids a border crossing, and gives El Chalten enough time to breathe.
What you miss: Torres del Paine, Chilean Patagonia, Bariloche, Ushuaia, and the wildlife coast.
That is enough for a short trip. Adding another region usually makes the week feel smaller, not bigger.
7 Days: Torres del Paine Focus
Best for: travelers who care most about Chile’s most famous national park.
Day 1: Arrive in Puerto Natales or Punta Arenas, transfer to Puerto Natales.
Day 2: Gear check, park logistics, short Puerto Natales day.
Days 3 to 6: Torres del Paine day hikes, scenic drives, boat trip, or a short trek plan.
Day 7: Return to Puerto Natales or Punta Arenas and depart.
This version is cleaner if you stay inside or near the park, but it can be more expensive. A Puerto Natales base is easier and often cheaper, though it means longer day-trip travel.
If the W Trek is the point, 7 days is possible only if almost the whole trip is built around it. You will need to reserve refugios or campsites, arrange park transport, and keep the rest of the itinerary simple.
7 Days: Bariloche and the Lake District
Best for: families, soft adventure, food, lakes, winter skiing, and travelers who want beauty with infrastructure.
Bariloche is the best one-week Patagonia choice if you want a less extreme trip. Visit Argentina describes Bariloche as a year-round destination with adventure tourism, chocolate, hiking, kayaking, cycling, snow sports, and a recommended stay of 2 to 7 days.
Use your week for Circuito Chico, lake viewpoints, kayaking, short hikes, a day trip toward Villa La Angostura or the Seven Lakes area, and food. In winter, reshape the itinerary around skiing or snow activities.
7 Days: Ushuaia and Tierra del Fuego
Best for: far-south atmosphere, Beagle Channel, winter travel, Antarctica add-ons, and travelers who do not want to cross Patagonia overland.
Visit Argentina’s Ushuaia page recommends 2 to 4 days and highlights Beagle Channel tours, Cerro Castor skiing, Martial Glacier, Tierra del Fuego National Park, and the airport. With a week, you can go slower, add weather flexibility, and avoid treating Ushuaia as a rushed checkbox.
This is not the best first itinerary if your main dream is Fitz Roy or Torres del Paine. It is best when the end-of-the-world setting itself is the point.
10 Day Patagonia Itinerary
For the full Day 1–10 breakdown with transport and border logistics, see the complete 10 day Patagonia itinerary guide.
A 10 day Patagonia itinerary can include both Argentina and Chile, but there is no spare room for a bloated wish list.
This is the shortest trip length where I would consider the classic southern Patagonia route:
El Calafate -> El Chalten -> Puerto Natales -> Torres del Paine
10 Days: Classic Southern Patagonia
Best for: first-time travelers who want the biggest icons and can handle a tight pace.
Day 1: Arrive in El Calafate.
Keep this day easy. If you arrive early, walk the lakefront or handle logistics.
Day 2: Perito Moreno Glacier.
Spend a full day at the glacier. Add a boat tour or ice trekking if it matters to you.
Day 3: Transfer to El Chalten.
Arrive, check the forecast, and do a short hike if skies are clear.
Day 4: El Chalten major hike.
Use the best forecast for Laguna de los Tres, Laguna Torre, or Loma del Pliegue Tumbado.
Day 5: El Chalten second hike or buffer.
This is the day that protects the route. If you get two good hiking days, excellent. If not, at least you did not build the whole El Chalten section around one shot.
Day 6: Transfer from El Chalten or El Calafate to Puerto Natales.
This is a logistics day. Treat it like one. Border crossings and bus schedules are not scenic filler; they are the structure of the trip.
Day 7: Torres del Paine day trip or park transfer.
If based in Puerto Natales, do a full-day park tour or rental-car loop. If staying in/near the park, transfer and do a shorter viewpoint.
Day 8: Torres del Paine hike or scenic day.
Choose Base Torres, French Valley area, Grey Glacier area, or a lower-effort scenic route depending on season and conditions.
Day 9: Buffer, second park day, or return to El Calafate/Punta Arenas.
This depends on your exit airport. Do not leave the return transfer to wishful thinking.
Day 10: Depart.
This itinerary works, but it is tight. I would not add Bariloche, Ushuaia, Peninsula Valdes, or the Carretera Austral. Save them for another trip or extend the current one.
10 Days with the W Trek
Best for: hikers who care more about the W Trek than broad destination coverage.
If the W Trek is non-negotiable, build around it first:
Day 1: Arrive Puerto Natales.
Day 2: Prepare, buy food, confirm bookings.
Days 3 to 7: W Trek.
Day 8: Return to Puerto Natales and recover.
Day 9: Transfer to El Calafate or add a light Torres del Paine scenic day.
Day 10: Depart or continue.
You can add Perito Moreno Glacier if your flights and transfer timing cooperate, but do not pretend this is a relaxed Argentina-plus-Chile itinerary. It is a Torres del Paine trekking trip with a possible glacier add-on.
Two weeks is the best first-time Patagonia itinerary length for most travelers.
It is long enough to combine Argentina and Chile without rushing every morning. It is short enough that you still need discipline. The key choice is whether your 2 week Patagonia itinerary includes the W Trek or uses day hikes and scenic bases.
2 Weeks: Classic Argentina and Chile Highlights
Best for: first-time travelers who want Perito Moreno, Fitz Roy, and Torres del Paine without a full multi-day trek.
Day 1: Arrive in El Calafate.
Settle in, walk town, and confirm glacier transport.
Day 2: Perito Moreno Glacier.
Visit the walkways. Add boat or ice trekking if desired.
Day 3: El Calafate extra activity or transfer to El Chalten.
If you are less interested in El Calafate, transfer earlier. If you want a slower start, stay one more night.
Days 4 to 7: El Chalten.
Spend three to four nights here. This gives you real weather flexibility for Fitz Roy, Laguna Torre, shorter viewpoints, or a rest day.
Day 8: Transfer to Puerto Natales.
This is your cross-border logistics day.
Day 9: Puerto Natales prep or light day.
Do laundry, buy food, rent a car if needed, confirm park tickets or tours, and eat a proper meal.
Days 10 to 12: Torres del Paine.
Use these days for day hikes, scenic drives, Grey Glacier area, Base Torres if conditions and fitness fit, wildlife, and viewpoints. Staying inside or near the park reduces daily travel. Puerto Natales is more flexible and cheaper.
Day 13: Buffer or return transfer.
Use it for a missed park day, a calmer Puerto Natales day, or positioning for departure.
Day 14: Depart via Puerto Natales, Punta Arenas, or El Calafate.
This is the itinerary I would recommend to many first-time travelers. It has the icons, but it does not force the W Trek if the traveler does not actually want a hut/camp logistics project.
2 Weeks with the W Trek
Best for: hikers who want the classic trek and still want Argentina’s glacier and El Chalten.
Day 1: Arrive El Calafate.
Day 2: Perito Moreno Glacier.
Day 3: Transfer to El Chalten.
Days 4 to 6: El Chalten hikes and weather buffer.
Day 7: Transfer to Puerto Natales.
Day 8: Prep day in Puerto Natales.
Days 9 to 13: W Trek.
Day 14: Return/depart, or add one night if flights require it.
This is a good route, but it depends on W Trek reservations. It also leaves limited recovery time. If you are not an experienced hiker, consider adding days or switching to day hikes.
The W Trek portion should be built from official and operator information close to travel. The Chile Travel W Trek guide notes limited refugio/campsite capacity and recommends booking months ahead. CONAF should be checked for current park notices, especially outside peak summer.
2 Weeks: Argentina-Only Patagonia
Best for: travelers who want simpler logistics, no border crossing, and strong hiking/glacier payoffs.
Route:
Buenos Aires -> El Calafate -> El Chalten -> Bariloche or Ushuaia -> Buenos Aires
Version A: El Calafate, El Chalten, Bariloche.
This gives you glaciers, Fitz Roy hikes, and northern lake country. It is a good choice if you want variety and infrastructure.
Version B: El Calafate, El Chalten, Ushuaia.
This gives you glaciers, hiking, and the far south. It is more dramatic geographically, but the flight logistics can be more annoying.
Version C: Bariloche only plus El Calafate/El Chalten.
This is a good family or soft-adventure version.
The Argentina-only route is underrated. Some travelers feel they have failed if they do not cross into Chile. You have not failed. You have chosen a route that fits your time.
2 Weeks: Chile-Focused Patagonia
Best for: Torres del Paine, Puerto Natales, Punta Arenas, and Chilean road/fjord scenery.
Route:
Santiago -> Puerto Natales or Punta Arenas -> Torres del Paine -> Puerto Natales -> Carretera Austral section or Punta Arenas/Tierra del Fuego
For many travelers, the Chile-focused version is either a W Trek trip or a scenic road-and-lodge trip. Trying to combine the full Carretera Austral with Torres del Paine in 2 weeks is possible only as a selective route, not the whole road.
Chile Travel says the Carretera Austral is more than 1,200 kilometers and includes barge crossings. That is not a casual side trip from Torres del Paine. Treat it as its own route unless you have extra days.
For most travelers, this is the point where a two-week trip should stop expanding. Add depth, not another distant region.
Three weeks changes the trip. You can stop asking, “Can I squeeze it in?” and start asking, “Which extension actually improves the route?”
The best 3 week Patagonia itinerary is usually:
Classic southern Patagonia route + one major extension.
Choose one:
Bariloche and the Lake District.
Ushuaia and Tierra del Fuego.
Peninsula Valdes wildlife.
A section of the Carretera Austral.
Do not add all four unless you are secretly planning a month and refusing to admit it.
3 Weeks: Classic Route Plus Bariloche
Best for: variety, food, lakes, families, softer adventure, and northern Patagonia scenery.
Route:
Bariloche -> El Calafate -> El Chalten -> Puerto Natales -> Torres del Paine
This route works well if you can connect Bariloche to El Calafate by flight or a sensible transport plan. It gives you a more complete Argentine Patagonia feel before the southern icons.
Suggested pacing:
Days 1 to 4: Bariloche.
Days 5 to 7: El Calafate and Perito Moreno.
Days 8 to 11: El Chalten.
Day 12: Transfer to Puerto Natales.
Days 13 to 17: Torres del Paine, either day hikes or W Trek.
Days 18 to 19: Buffer and Puerto Natales.
Days 20 to 21: Return/depart.
This is one of the best routes for travelers who want Patagonia to feel varied rather than purely rugged.
3 Weeks: Classic Route Plus Ushuaia
Best for: far-south atmosphere, Antarctica add-ons, Beagle Channel, and travelers drawn to Tierra del Fuego.
Route:
Ushuaia -> El Calafate -> El Chalten -> Puerto Natales -> Torres del Paine
or
El Calafate -> El Chalten -> Puerto Natales -> Torres del Paine -> Ushuaia
Ushuaia works best when you have a reason to go. Visit Argentina highlights the Beagle Channel, Cerro Castor, Martial Glacier, Tierra del Fuego National Park, and Antarctica gateway role. It recommends 2 to 4 days, which makes it a natural 3-week extension but a rushed 10-day add-on.
Suggested pacing:
Days 1 to 3: Ushuaia.
Days 4 to 6: El Calafate.
Days 7 to 10: El Chalten.
Day 11: Transfer to Puerto Natales.
Days 12 to 16: Torres del Paine.
Days 17 to 19: Buffer, extra park time, or Punta Arenas.
Days 20 to 21: Return/depart.
If you are connecting by bus through Tierra del Fuego, be more conservative. If you are flying, check whether the route requires backtracking through Buenos Aires or another hub.
3 Weeks: Classic Route Plus Wildlife
Best for: whales, penguins, sea lions, elephant seals, orcas, and photographers.
Route:
Puerto Madryn/Trelew -> El Calafate -> El Chalten -> Puerto Natales -> Torres del Paine
This route makes the most sense in the right season. Visit Argentina’s Peninsula Valdes page lists September through November as the ideal time and notes whale, sea lion, and orca timing. If wildlife is your reason, build around species calendars first.
Suggested pacing:
Days 1 to 4: Puerto Madryn, Peninsula Valdes, Punta Tombo or related wildlife.
Days 5 to 7: El Calafate.
Days 8 to 11: El Chalten.
Day 12: Transfer to Puerto Natales.
Days 13 to 17: Torres del Paine.
Days 18 to 21: Buffer, return, or extra route time.
This is a more original Patagonia itinerary than the usual all-mountain plan. It also gives the trip a completely different texture.
3 Weeks: Classic Route Plus Carretera Austral Section
Best for: road-trippers, remote landscapes, ferries, forests, rivers, and travelers who enjoy logistics.
This is not the easiest extension. It can be excellent, but it needs careful routing. You are connecting two different Patagonia planning problems: the southern icons and a remote Chilean road route.
Possible structure:
Days 1 to 7: Carretera Austral section.
Days 8 to 10: Position south by flight, ferry, or road plan.
A 1 month Patagonia itinerary is where the region starts to make more sense.
With a month, you can combine northern Patagonia, southern Patagonia, and one or two major extensions without turning every day into a transfer. You still cannot see everything. That is not a failure. Patagonia is bigger than your annual leave.
30 Days: Deep Patagonia Route
Best for: travelers who want range, not just highlights.
Day 1 to 5: Bariloche and northern lake country.
Use Bariloche for Circuito Chico, Cerro Campanario, lake activities, short hikes, food, and a day trip toward Villa La Angostura or San Martin de los Andes if logistics work.
Day 6 to 7: Transfer south.
Fly or connect toward El Calafate. Treat this as a route day, not a sightseeing day.
Day 8 to 10: El Calafate.
Visit Perito Moreno Glacier. Add a glacier cruise, estancia, or rest day if the budget allows.
Day 11 to 15: El Chalten.
This is enough time to wait for weather and hike several routes without panic.
Day 16: Transfer to Puerto Natales.
Cross to Chile and settle.
Day 17 to 22: Torres del Paine.
Choose W Trek, day hikes, in-park lodge time, or a scenic-drive version.
Day 23 to 25: Puerto Natales, Punta Arenas, or buffer.
Use this for recovery, weather, laundry, transport, or a penguin trip depending on season.
Day 26 to 29: Ushuaia or wildlife coast.
Pick one. Ushuaia gives far-south atmosphere and Beagle Channel. Peninsula Valdes gives wildlife if the timing works.
Day 30: Return/depart.
This route has enough space to feel human. You can also reverse it or swap Ushuaia for a Carretera Austral section.
30 Days: Road-Trip Patagonia
Best for: travelers who want roads, small towns, and flexibility.
This is where a rental car or campervan starts making more sense, though one-way and cross-border rental rules can be expensive or restrictive. A road trip might combine Bariloche, Ruta 40 sections, El Chalten, El Calafate, Torres del Paine, and possibly parts of Chilean Patagonia.
Best for: hostels, buses, camping, budget control, and slower travel.
Backpackers should not just copy a rental-car itinerary. Buses work well on popular corridors, but they still dictate rhythm. Build around:
El Calafate airport.
Bus to El Chalten.
Bus from El Calafate or El Chalten toward Puerto Natales when schedules allow.
Hostels in El Chalten, El Calafate, and Puerto Natales.
Camping or refugio choices only after checking rules and reservations.
Budget travelers often try to save money by adding overnight buses, tighter connections, and fewer buffer days. Sometimes that works. In Patagonia, it can also cost you the one clear day you needed.
For backpackers, the route should be slower than the map suggests. The money you save on transport is only useful if you still protect the weather days.
Patagonia Honeymoon Itinerary
Best for: scenic lodges, private transfers, comfort, photography, food, and lower-stress pacing.
A Patagonia honeymoon should not feel like a military schedule with better wine. I would build it around fewer bases:
2 to 3 nights El Calafate.
3 to 4 nights El Chalten or a lodge nearby.
3 to 5 nights Torres del Paine, ideally inside or near the park.
Optional Bariloche or Ushuaia extension if you have 3 weeks.
Spend money where it changes the trip: location, views, transfer simplicity, and time saved. Do not overspend on a luxury property if it forces one-night stays everywhere else.
For a honeymoon-style route, fewer bases usually beats more famous names. Spend the saved energy on better locations, better meals, and better views.
Patagonia Without Hiking
Best for: scenic travelers, mixed-ability groups, families, photographers, and anyone who wants Patagonia without hard trails.
Patagonia without hiking is not a lesser trip. It is just a different route.
Good stops:
Perito Moreno Glacier walkways.
Torres del Paine scenic drives and viewpoints.
Grey Glacier boat trips when operating.
Beagle Channel cruises from Ushuaia.
Bariloche Circuito Chico and lake viewpoints.
Peninsula Valdes wildlife.
Estancias and food-focused stays.
Skip or modify:
W Trek.
Long El Chalten itineraries built only around strenuous hikes.
Remote road segments with limited services if comfort matters.
The key is to stop treating hikes as the only measure of success. Patagonia also works through glaciers, boat days, wildlife, food, viewpoints, estancias, and slow scenic routes.
Family Patagonia Itinerary
Best for: older kids, nature-loving families, and parents who understand that fewer bases are better.
Strong family bases:
Bariloche.
El Calafate.
Ushuaia.
Puerto Madryn.
Puerto Natales with easy Torres del Paine viewpoints.
Be careful with:
W Trek unless the family is genuinely trekking-ready.
Too many long bus days.
One-night stops.
Weather-exposed hikes with no backup.
Use Patagonia for Families once that supporting guide is live.
A Patagonia trip itinerary usually fails in one of two places: transport logic or booking order.
Entry and Exit Airports
Common Argentina gateways:
El Calafate for Perito Moreno and El Chalten.
Bariloche for northern Patagonia.
Ushuaia for Tierra del Fuego.
Trelew or Puerto Madryn for Peninsula Valdes.
Common Chile gateways:
Puerto Natales for Torres del Paine when flights line up.
Punta Arenas for higher flight frequency and regional connections.
Puerto Montt for the northern Carretera Austral.
For the classic route, look at open-jaw flights. Flying into El Calafate and out of Puerto Natales or Punta Arenas can save backtracking. Sometimes it costs more. Sometimes it saves a full day. Compare both, not just ticket price.
Buses
Buses are useful on the classic route. They are common between El Calafate and El Chalten, between El Calafate and Puerto Natales, and between Puerto Natales and Torres del Paine in season. They are not the same as a subway. Schedules vary, border crossings take time, and a missed connection can reshape the next day.
Rental Cars
Rental cars help around El Calafate/El Chalten, Torres del Paine scenic routes, Bariloche, Peninsula Valdes, and some road-trip itineraries. They also add complexity:
Cross-border permits.
One-way fees.
Insurance restrictions.
Gravel roads.
Fuel planning.
Wind.
Ferry reservations in Chilean Patagonia.
Do not rent a car just because it feels adventurous. Rent one when it solves a route problem.
Domestic Flights
Flights are useful when connecting distant regions: Bariloche to El Calafate, Buenos Aires to Ushuaia, Santiago to Punta Arenas, and similar routes. The issue is that flights may connect through hubs, vary by season, or operate on schedules that force overnight stops.
What to Book First
Book in this order:
International flights, if fixed.
Domestic Patagonia gateway flights.
W Trek, O Circuit, refugios, campsites, and in-park Torres del Paine lodging.
High-demand lodging in El Chalten, El Calafate, Puerto Natales, Bariloche, and Ushuaia.
Park tickets and official passes close to travel, following current rules.
If your itinerary includes Torres del Paine in winter or shoulder season, check CONAF before you treat any route as available. The notice checked on May 26, 2026 included winter guide requirements and seasonal closures. Those details can change, which is exactly why you should verify.
The place I would most protect is El Chalten. It is easy to think, “I only need two hikes.” That is true if the weather cooperates. The weather does not read your itinerary.
Best Season for These Itineraries
For most Patagonia itineraries in this guide, the best season is late November through March.
Choose December to February for maximum access, long days, and full travel infrastructure. Choose March for fewer crowds, autumn color, and a calmer trip feel. Choose November for spring conditions and shoulder-season value, with some risk around snow and opening schedules.
Winter trips are different. A winter Patagonia itinerary should focus on Bariloche skiing, Ushuaia snow activities, guided winter Torres del Paine travel, or a deliberate low-season plan. Do not run a summer hiking itinerary in July by simply adding a warmer jacket.
If a friend asked me for the best first-time Patagonia itinerary, I would not start by asking how many places they want to see. I would ask how many days they can protect.
With 7 days, I would send them to El Calafate and El Chalten.
With 10 days, I would build El Calafate, El Chalten, and Torres del Paine, but I would warn them not to add anything else.
With 14 days, I would choose the classic southern route and decide whether the W Trek is truly worth the fixed bookings and physical effort.
With 21 days, I would add Bariloche if they want variety and comfort, Ushuaia if they are fascinated by the far south, Peninsula Valdes if wildlife is the point, or the Carretera Austral if they love road-trip logistics.
With a month, I would slow down, add weather buffers, and stop trying to win Patagonia.
The best route is not the one that proves you saw everything. It is the one that lets you be there when the cloud lifts.
You need at least 7 days for one focused region, 10 days for a tight classic southern Patagonia route, 14 days for the best first-time balance, and 3 weeks or more if you want to add Bariloche, Ushuaia, Peninsula Valdes, or the Carretera Austral. A month is better if you want a broad Patagonia trip without rushing.
Is 7 days enough for Patagonia?
Seven days is enough for one region of Patagonia, not the whole region. The best 7 day Patagonia itinerary is usually El Calafate and El Chalten, Torres del Paine only, Bariloche, Ushuaia, or Peninsula Valdes if wildlife is your priority.
Is 10 days enough for Patagonia?
Ten days is enough for a tight southern Patagonia itinerary with El Calafate, El Chalten, Puerto Natales, and Torres del Paine. It is not enough for a comfortable route that also includes Bariloche, Ushuaia, Peninsula Valdes, and the Carretera Austral.
What is the best 2 week Patagonia itinerary?
The best 2 week Patagonia itinerary for most first-time travelers is El Calafate, El Chalten, Puerto Natales, and Torres del Paine. You can do it as a day-hiking and scenic route or as a hiking-focused route with the W Trek.
Should I visit Argentina or Chile Patagonia?
For a first trip, the best answer is often both, using the classic southern route. Argentine Patagonia gives you El Calafate, Perito Moreno Glacier, and El Chalten. Chilean Patagonia gives you Puerto Natales and Torres del Paine. If you have only a week, choose one side.
Should I include Ushuaia in my Patagonia itinerary?
Include Ushuaia if you have 3 weeks or more, if Antarctica is part of the trip, if you want the Beagle Channel and Tierra del Fuego, or if the far-south atmosphere matters to you. Skip it on a short itinerary if it steals needed days from El Chalten or Torres del Paine.
Should I include Bariloche in my Patagonia itinerary?
Include Bariloche if you have 3 weeks, want northern Patagonia lake scenery, are traveling with family, want softer adventure, or are visiting in winter for skiing. Skip it on a 10 day southern Patagonia route.
Do I need a rental car in Patagonia?
You do not need a rental car for every Patagonia itinerary. Buses work on classic routes such as El Calafate to El Chalten and Puerto Natales to Torres del Paine. A rental car helps with scenic flexibility, Bariloche, Peninsula Valdes, road trips, and some Torres del Paine day routes, but cross-border paperwork and one-way fees matter.
Which direction should I travel in Patagonia?
For the classic route, both directions work: El Calafate to El Chalten to Puerto Natales/Torres del Paine, or the reverse from Puerto Natales/Punta Arenas toward El Calafate. Choose based on flight prices, W Trek availability, and where you can build better weather buffers.
What should I book first for a Patagonia itinerary?
Book route-defining items first: domestic flights, W Trek/O Circuit refugios and campsites, in-park Torres del Paine lodging, high-demand small-town hotels, rental cars with cross-border permits, specialty tours, buses, and ferries. Park tickets and official passes should be checked close to travel date.
Official Sources and Image License Notes
This article uses official destination and park sources for planning facts:
Images are sourced from Wikimedia Commons under their respective licenses (CC BY, CC BY-SA, or public domain). Each photo links to its source page and author on Wikimedia Commons. Hero image: CC BY 2.0 via Wikimedia Commons.
Also on this pillar — Itineraries9 sheets · See all